


- 1-click domain name setup. 1-click to over 150 free apps
- Free SSL, Daily Backups
- Support available 24/7/365 via Chat, Phone and Knowledge Base

- 30 Day Refund Policy
- Free domain, Free site transfers, Free SSL certificate
- Support available 24/7/365 via Phone, Chat, Tweet, Knowledge Base

- 30-Day Money-back Guarantee
- Custom-Built WP Optimization Stack and LiteSpeed Cache
- Excellent 24/7/365 Customer Support
GoDaddy vs HostGator vs Hostinger: Quick Summary
Hostinger is the overall winner in this comparison, and honestly, the difference is hard to ignore. After testing all three platforms hands-on, I found Hostinger consistently ahead in almost every area: pricing, speed, ease of use, built-in features, and security.
It’s faster than GoDaddy and HostGator, more beginner-friendly, and offers premium-level features without the upsells.
If you want hosting that’s reliable, affordable, and easy to manage, even for non-techies, Hostinger is the one I’d recommend.
1. Prices and Plans Comparison
Hostinger’s Budget-Friendly Plans Make It the Best Value Pick.
Hostinger clearly offers the best bang for your buck. It consistently gives you more storage, faster tech, and stronger WordPress tools at a lower price, without upsells. Even their premium WordPress and cloud hosting options cost far less than what you’d pay at GoDaddy or HostGator for similar specs.
GoDaddy’s plans shoot up after the first year, and HostGator, while more affordable than GoDaddy, doesn’t match Hostinger’s speed or features at the same price point.
2. Customer Support Comparison: Who’s Got Your Back?
HostGator Provides Great Support in Minutes.
When you’re hosting a website, things can go wrong fast. That’s why I took time to test each provider’s support system hands-on.
GoDaddy Customer Support
To test how GoDaddy handles support, I started by initiating a chat through the “Contact Us” page. At first, I was connected to their AI assistant. I asked a technical question about the difference between their self-managed and fully managed VPS hosting options.
The bot gave me a basic overview, which was helpful, but I wanted to talk to a real person.

I typed “Talk to agent,” and within a minute, I was in a queue. It didn’t take long before a support rep named Rakshitha Bellapukonda joined.
I asked the same question again, and this time, the response was much more structured and in-depth. She clearly explained what each plan includes—from security updates to emergency monitoring—and what level of control I’d have.

While the initial AI wasn’t very detailed, once I got to a human, the support was solid. The transition was smooth, and the agent was knowledgeable.
- Response Time: Quick
- Agent Expertise: Good
- Overall Impression: Positive once connected to a human
HostGator Customer Support
Next, I tested HostGator’s support through their live chat option. From the homepage, I hovered over “Contact” and clicked “Live Chat.”

A pop-up opened immediately, and I was guided through a few simple prompts.
I selected that I was interested in purchasing new services and typed in my name and email. Within 30 seconds, I was connected to an agent named Pratik.
I asked whether I could run a Laravel app that uses a queue system (like Redis or Supervisor) on their shared or VPS plans, and whether I’d get terminal access. Pratik was clear and precise: he told me shared hosting wouldn’t work for that setup, but their VPS plan would support it, including full terminal access.

He didn’t push for a sale aggressively, but gently asked if I’d like help purchasing a plan. It felt like chatting with someone who knows the platform inside out and genuinely wanted to assist.
- Response Time: Lightning-fast
- Agent Expertise: Excellent
- Overall Impression: Impressive—very beginner-friendly yet technically sound
Hostinger Customer Support
With Hostinger, I wanted to see if their support is as smooth as their UI. I logged into my account and clicked the “Help” icon in the bottom-right corner of hPanel.
An AI assistant named Kodee popped up first. I asked about managing a VPS via SSH. Kodee’s answer was surprisingly complete—it told me I could use tools like PuTTY, access the server with either SSH key or password, and even offered to walk me through SSH key setup.

Still, I wanted to speak to a human. I typed my request, and within seconds, a support rep named Ignas joined. I asked if I could set up a reverse proxy with load balancing on my VPS.
Ignas confirmed it was fully possible and mentioned that I’d have root access. He also suggested using NGINX and gave me a direct link to Hostinger’s official documentation on setting it up.

What stood out was how fast everything happened. I wasn’t passed around, I didn’t have to repeat myself, and I got technical, real-world advice I could act on.
- Response Time: Instant
- Agent Expertise: Advanced
- Overall Impression: Clean, efficient, and ideal for power users
3. Hosting Features Comparison
Hostinger Offers More Features for Less Money.
Hostinger Features
After personally setting up and managing multiple sites on Hostinger, what really stood out to me was how smooth everything felt, especially with their custom hPanel. It’s cleaner and easier to use than traditional cPanel.

I had no problem setting up WordPress, email, SSL, and backups—everything was just a click away. The free site migration was fast and painless. Even the daily backups kicked in without any setup required.
I also liked how the built-in AI website builder gave me a simple site mockup in under a minute, which is helpful when you need a fast launch.

And the performance? Fast thanks to NVMe storage and LiteSpeed servers.
HostGator Features
HostGator covers all the essentials, but some things felt more locked behind higher-tier plans. I could easily launch a WordPress site with their one-click installer, and the portal is simple enough to use.

They give you unmetered bandwidth and SSD storage, but only the Business plan offers daily backups, and migration isn’t free unless you handle it manually. That was a letdown compared to Hostinger.
Still, their integrated Cloudflare CDN, malware protection, and support for up to 50 websites (on shared plans) are decent perks.
Plus, if you’re comfortable with cPanel and want more control, HostGator’s got you covered.
GoDaddy Features
GoDaddy looks great on paper with its robust infrastructure and features like automatic daily backups, free SSL, and DDoS protection across all plans. I tried the Deluxe plan and was able to host 10 websites with decent NVMe storage and free email.
Their dashboard isn’t as beginner-friendly as Hostinger’s hPanel, but if you’re used to cPanel, it gets the job done.
One unique perk I explored was GoDaddy Airo™—an AI-powered tool that kicks in as soon as you buy a domain. It instantly helps you build a website, generate a logo, and even spin up email campaigns and social media content. It’s a great way to launch fast if you’re starting from scratch.

That said, some extras like unlimited SSL or premium DNS only unlock with higher-tier plans. And while the WordPress-specific features are solid, they’re not quite as seamless or optimized as what I got on Hostinger.
4. Website Performance Comparison
Hostinger Is Faster and More Reliable.
When choosing a hosting provider, performance isn’t just a “nice to have”—it directly affects your SEO rankings, bounce rates, and user experience.
So, I ran real GTmetrix tests on websites hosted by GoDaddy, HostGator, and Hostinger to see how they compare in terms of page speed, interactivity, and load times.
Hostinger Performance Review

Hostinger absolutely crushed this test. The site I tested loaded completely in under a second, with a fully loaded time of just 790ms.
The Largest Contentful Paint was lightning fast at 408ms, meaning the main content appeared before most users could blink.
I also noticed how consistent and stable the page load was—zero layout shifts, and everything felt smooth even when re-running the test multiple times.
From a user perspective, this is exactly the kind of experience you want, especially if you’re running a business or eCommerce site.
GoDaddy Performance Review

GoDaddy wasn’t bad, but it was noticeably slower than Hostinger. The Largest Contentful Paint came in at 2.2 seconds, and the full page loaded in 2.7 seconds.
While Total Blocking Time was low at 34ms, which is great for interactivity, the slower LCP suggests that the main content took longer to become visible.
It’s acceptable performance overall, but not impressive, especially when compared to Hostinger.
HostGator Performance Review

This one surprised me. Despite having a solid structure score of 93%, HostGator’s actual performance wasn’t great.
The Total Blocking Time was huge, 2.1 seconds, which means users would likely notice a delay in responsiveness. And even though the Largest Contentful Paint was fast at 1.1 seconds, the Fully Loaded Time was a massive 17.4 seconds.
In simple terms, the page shows up quickly, but it takes forever to finish loading all the scripts, styles, and media. That’s not ideal for users who care about fast browsing.
5. Ease of Use Comparison: Which Platform Is Easier to Use?
Hostinger Wins for Ease of Use Thanks to Its Seamless Setup and Beginner-Friendly Dashboard.
Registration and Creating a New Account
I started with GoDaddy. I wanted to test how smooth the sign-up experience was and if there were any frustrating steps.
I clicked on a WordPress hosting plan (Managed WordPress Deluxe) and hit “Buy.”

It took me to a cart page where I had to create an account—using email, Facebook, or Google. I chose email.
But then came the upsells. Things like extra security, SEO tools, additional installs—pre-selected by default.

I had to go through everything and uncheck the upsells I didn’t want. That was a bit annoying. After payment, I landed in the GoDaddy dashboard and was ready to start. Overall, the process was quick but cluttered with marketing add-ons.
Next, I went to HostGator. The process here felt more intuitive, especially for beginners. I hovered over “Hosting” in the top menu, clicked “Web Hosting,” chose the Baby Plan, and hit “Choose Plan.”

I was then asked to either register a domain, use my own, or choose one later—I went with the “choose later” option.

On the next screen, I reviewed the plan term (I picked the 3-year option at $4.50/mo) and saw some well-marked upsells, like:
- Professional Email Trial (auto-renews at $2.99/mo)
- SiteLock Security ($2.99/mo)
- CodeGuard Backups ($1.99/mo)

While these were pre-selected, it was clear what they were, and I could easily remove them. On the right, the Order Summary clearly displayed pricing, savings, and total cost. After applying a promo code, I hit “Continue to Checkout.”
On the next page, I entered:
- Billing info
- Created a password
- Choose payment method (credit card)
After confirming everything, I clicked “Submit Payment”—done. I found the process very easy, transparent, and beginner-friendly.
Lastly, I tested Hostinger. Here’s where things got impressively simple. I clicked on “Web Hosting” from the top Services menu and selected the Business plan.

I hit “Choose Plan,” and from there, the process was smooth and lightning fast.
There were no weird upsells, no forced add-ons. I:
- Picked a billing term
- Entered my email
- Created a password
- Entered payment info

Once paid, I was taken directly to the hPanel dashboard. Everything was ready—no delays, no email confirmation, no DNS configuration. It just worked.
Hostinger’s signup was the smoothest and most friction-free of the three.
User Interface – Client Area & Dashboard
Starting with GoDaddy. The dashboard wasn’t too hard to navigate, but it felt a bit crowded. On the left, there’s a menu with tabs like:
- Dashboard
- Domain
- Website
- Store
- Marketing
- Conversations

On the Dashboard home tab, I saw a setup progress bar, a promo for upgrading from free trial, and a “Here’s how to get started” checklist.
The action items were helpful (like publishing your site or connecting a domain), but the layout could overwhelm new users.
Clicking any item opened its setup panel on the right. I could see how someone used to cPanel would feel at home, but not the best for beginners.
Then I explored the HostGator dashboard. After login, I landed in the Customer Portal.

Everything was centralized:
- You see all hosting plans in a table: plan name, domain, status, renewal date
- Left-hand menu was neat: Home, Websites, Email & Office, Domains, Hosting, and Marketing
Under “Hosting,” each plan had “Manage” and “cPanel Email” buttons. Clicking “Manage” opened the dashboard for that plan, with direct access to:
- Server IP
- FTP
- DNS
- cPanel login
There was also a “Buy More Hosting” button at the top, making it simple to expand. The interface was clear, action-oriented, and not too technical. You get what you need, without digging through layers of menus.
Lastly, I tested Hostinger’s dashboard—hPanel. Right after payment, I landed in hPanel, and it immediately felt modern and beginner-friendly. Everything was structured cleanly:

- On the left: Websites, Domains, Emails, Backups, VPS, Databases, etc.
- On the dashboard: My services listed like cards (Web Hosting, VPS, Domains), each with Manage buttons.
Clicking “Manage” opened a site-specific dashboard with real-time server stats, install tools, SSL toggles, cache control, and backups—all visually organized.
Unlike GoDaddy or HostGator, there was no need to click through different sections to access basic functions. Hostinger’s hPanel was by far the cleanest and easiest to navigate.
Hosting Setup – Creating a New WordPress Website
Starting with GoDaddy, I wanted to see how easy it would be to install WordPress from inside the dashboard. After purchasing a hosting plan, I logged into my account and went to the Web Hosting section. Under the specific hosting account I was using, I clicked “Manage.”

From there, I was taken to the hosting dashboard, where I found a section labeled “Websites.” Under my domain, I clicked “Install Application.” This opened up a new screen called the Installatron Applications Browser.

Inside the browser, there’s a list of popular apps categorized by purpose—CMS, eCommerce, forums, etc. I scrolled to “Apps for Content Management” and selected WordPress Blog. After that, I clicked the button labeled “+ Install this application.”
Then came the setup steps.
GoDaddy gives you quite a few fields to go through before WordPress is actually installed:
- Domain & Directory – I had to choose the domain where I wanted WordPress installed. If I wanted to install it directly on the main domain (like example.com), I had to leave the directory field blank. If I typed something here (like blog), WordPress would be installed at example.com/blog.
- Version & Language – These were set to defaults. No changes needed.
- Admin Username and Password – GoDaddy pre-filled these fields with randomized values, but I changed them to something I’d remember. I also updated the admin email to one I use regularly.
- Website Title and Tagline – I filled in a name for my site and a short description (which appears in search engines).
- Advanced Settings – There were optional settings for things like auto-updates and backups. These were set to automatic by default, so I left them as they were.
If you’ve worked with hosting platforms before, this process is fairly straightforward. But if you’re a beginner, it might feel a bit overwhelming. There are a lot of fields, and if you’re not sure what each one means, it can slow you down.
Next, I went to HostGator to test how easy it would be to get my WordPress site up and running. The process was smoother than I expected.
Everything felt intuitive and beginner-friendly, from the moment I landed on the dashboard to the final WordPress login.
Here’s exactly how it went, step by step:
- Dashboard Entry
After I completed my purchase, I was redirected straight to the HostGator Customer Portal dashboard. No delays, no strange redirects — just a clean interface and clear next steps.
- Clicked on “Websites”
From the left-hand menu, I selected “Websites.” This is where all your websites will show up. Since I was starting fresh, the section was empty.
- Clicked “Add Site”
I hit the “Add Site” button. HostGator then redirected me to the Hosting tab to choose the hosting package where I wanted to install WordPress.

- Selected My Hosting Package
I found the plan I just purchased, clicked “Manage,” and it opened the hosting dashboard specifically for that package.

- Initiated WordPress Install
Inside the hosting dashboard, I clicked “Add Site” again, and this time, it brought me to the WordPress installation screen.

I selected “Install WordPress” and clicked “Continue.” At this point, HostGator asked for a few optional setup details.
Here’s what I filled in:
- Site Title: I could enter a name for my site (or skip it if I wanted).
- Domain Options: I was offered three convenient choices:
- Use a domain I already owned
- Use a temporary domain (great for testing or setting up before a domain is ready)
- Skip domain setup entirely and add one later
I picked my domain and hit confirm.
- Installation Started Automatically
HostGator immediately began the WordPress installation — no need to create a database, no need for FTP logins, no need to touch DNS settings. It just worked.
The install completed in under a minute.
- WordPress Access Was Seamless
Right after the install finished, HostGator gave me two easy ways to access my WordPress dashboard:
- Option 1: Single Sign-On from the Portal. I returned to Websites, clicked “Edit Site”, and was automatically logged in using SSO (Single Sign-On). No need to remember or type passwords.

- Option 2: Traditional wp-admin Login. I could also log in manually at yourdomain.com/wp-admin once DNS finished propagating, using the credentials that were shown during setup.
I used the SSO option, and it couldn’t have been more seamless. Within minutes of clicking “Buy,” I had a live WordPress site running — no manual setup, no technical confusion. Even if you’ve never built a website before, HostGator’s guided workflow walks you through every step clearly, and the process feels fast and efficient from start to finish.
It’s perfect for beginners but still flexible enough if you’re managing multiple sites. This is one area where HostGator really nails the user experience.
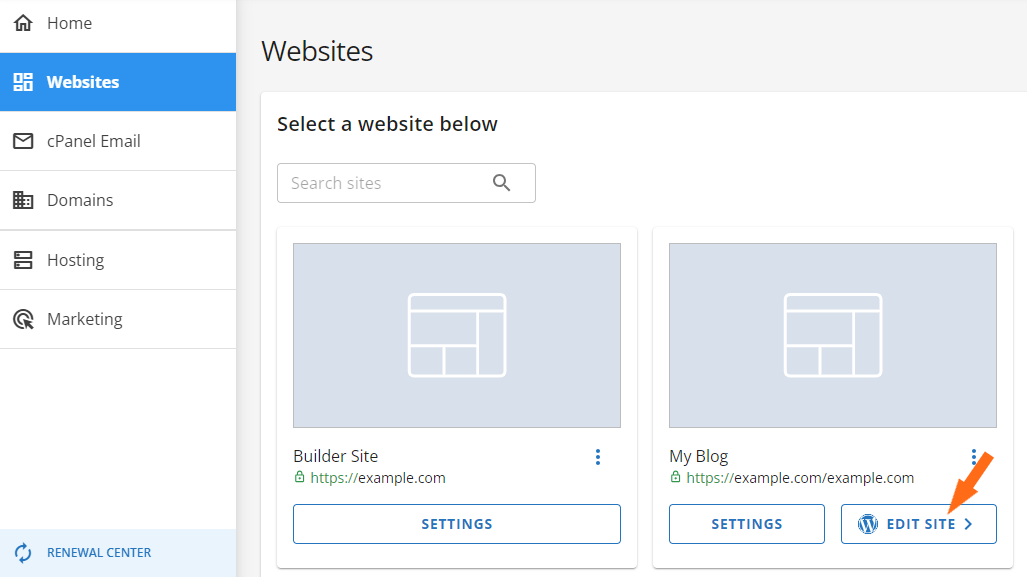
However, Hostinger nailed the WordPress setup. In hPanel, I just clicked “Websites” → “Add Website.”

Then, I selected “WordPress.” I was asked for:
- Site title
- Admin email
- Password

Clicked “Install,” and within 2 minutes, the site was up. No database setup. No domain configuration. SSL was automatically enabled. It was by far the fastest and easiest WordPress setup I’ve seen.
Server Management
With GoDaddy, I managed my server through cPanel, which is the standard control panel used by many hosting providers. It’s powerful and widely supported, but definitely built for users who have some familiarity with hosting.
To access cPanel:
- I went to my GoDaddy My Products page after logging in.
- Under the Web Hosting section, I found the hosting plan I wanted to manage.
- I clicked the “Manage” button next to that plan.
- That took me to a new page with an overview of my hosting account. In the top-right corner, I clicked “cPanel Admin.”
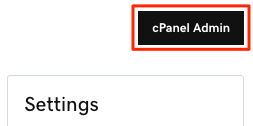


That launched the cPanel dashboard, where I could start managing my server.
Once I accessed cPanel, I was presented with a full suite of management tools—everything laid out in sections:
- Files – I could use the File Manager to upload, edit, or delete website files directly. It works like a simplified file explorer.
- Databases – GoDaddy supports both MySQL and phpMyAdmin. I could create new databases, manage tables, and import/export data easily.
- Cron Jobs – This lets you automate tasks, like scheduling a script to run every day at a specific time. Great for developers.
- SSL – You can install or manage SSL certificates. If your plan includes free SSL, you’ll find it already applied here.
- Subdomains – Adding subdomains (like blog.mysite.com) was just a few clicks away.
- Email Accounts – You can create and manage custom email addresses tied to your domain, like info@yourdomain.com.
The interface isn’t flashy, but it’s organized and functional. You won’t get lost if you’ve seen cPanel before—but if this is your first time using it, expect a bit of a learning curve. Still, everything is point-and-click once you know where to go.
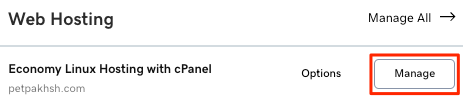
HostGator was better structured. In the Customer Portal under Hosting, I clicked “Manage.” The dashboard had:
- IP address
- cPanel login
- FTP and SSH info
- DNS settings

If you’re on VPS, you can click “Resources” to see usage graphs (CPU, RAM, etc.) and manage resources.
HostGator gives you a simple control panel for the basics, and cPanel for more advanced tasks.
With Hostinger, server management felt modern and powerful. Inside hPanel, I went to “VPS” → “Manage” and could see:
- My OS (AlmaLinux 9)
- Root login info
- Buttons for Reboot, SSH config, OS reset

Scrolling down, I had real-time graphs for:
- CPU usage
- RAM
- Disk

There were also tabs for:
- Firewall rules
- Backups & Monitoring
- Security settings
- DNS Manager
Every action was point-and-click. I didn’t need to open a terminal unless I wanted to. Even for VPS, Hostinger made server management accessible for non-techies.
6. Privacy and Security Comparison: Which Platform is More Secure?
Hostinger Offers the Most Complete Security Suite Out of the Box.
Note: * = Only available with higher-tier plans or third-party add-ons (like SiteLock or CodeGuard).
GoDaddy Privacy and Security
GoDaddy takes security seriously but puts many of its key protections behind paid upgrades. Every plan includes a free SSL certificate and DDoS protection, which is great for basic needs. However, daily backups, advanced malware removal, and CDN protection are only included in Advanced or Premium plans.
Their Web Application Firewall (WAF) filters malicious traffic and helps prevent attacks like SQL injections.

You also get continuous malware scanning and automated site monitoring. If malware is found, GoDaddy will clean it up, but the number of cleanups you get depends on your plan.
To help with recovery, GoDaddy offers automatic daily backups and snapshot backups on VPS plans. But again, full security requires upgrading.
There’s no secure access manager for team roles or controlled logins, which makes collaboration less secure for businesses managing teams or developers.
HostGator Privacy and Security
HostGator covers the basics well, but leaves much of the advanced protection to third-party tools like SiteLock.
You get free SSL, DDoS protection, basic malware scanning (if you use SiteLock), and Cloudflare CDN if you install it.
Shared and VPS plans include weekly backups, and you can add CodeGuard for more frequent backups and restore points. You can manage your own firewall settings, file permissions, and secure cPanel logins.
From the Customer Portal, you can enable free SSL, manage DNSSEC, scan your site with SiteLock, and set up automatic backups using CodeGuard.

HostGator does not provide a built-in secure access manager, so you’ll need to share login credentials manually. And while there is WAF support, it’s usually bundled within SiteLock, not built-in like with Hostinger or GoDaddy.
In short, HostGator gives you a solid base but puts more responsibility on the user to stay secure.
Hostinger Privacy and Security
Hostinger stood out here. All plans come with free SSL, daily backups, anti-malware scanning, WAF, DDoS protection, and a secure access manager—no need to upgrade or install third-party tools.
They use tools like Monarx to detect and clean malware in real time automatically. You also get 24/7 server monitoring, built-in firewall protection, and database encryption.

Hostinger’s Secure Access Manager is especially useful if you’re working with a team. You can give limited access to developers or collaborators without sharing your master login.

Email security is also covered, with spam and phishing protection built into their platform using SPF, DKIM, and DMARC.
Overall, Hostinger offers the most complete out-of-the-box security features without hidden upsells.
7. Server Locations Comparison
Hostinger Offers More Global Server Coverage with Greener Infrastructure.
GoDaddy Server Locations
With GoDaddy, the Web Application Firewall (WAF) runs on a solid Anycast network. That means your website content is delivered from multiple points of presence (POPs), improving performance and reducing latency.
These are strategically located in places like:
- San Jose, California
- Dallas, Texas
- Miami, Florida
- Washington, DC
- London, England
- Frankfurt, Germany
- Amsterdam, Netherlands
- Sofia, Bulgaria
- Tokyo, Japan
- Singapore
- Chicago, Illinois
So, performance-wise, GoDaddy does cover major traffic hubs globally. And if you’re using their newer security setup, you’re benefiting from Cloudflare’s CDN infrastructure, which is even more extensive.
When setting up my hosting plan, I could choose the region (like North America or Europe), which was helpful.
What I liked is that GoDaddy does allow you to change the server location later, but it’s not instant—you need to schedule a migration, which could involve some downtime. That’s a bit inconvenient if your needs shift quickly.
Overall, GoDaddy gives you solid global coverage, but it’s not the most flexible setup after launch.
HostGator Server Locations
HostGator’s servers are located in secure data centers across the US. They mention high security, strong network protection, and DDoS filtering, but you don’t really get a map or a list of where your server is physically located.
When I signed up, there wasn’t an option to choose my data center region, which felt limiting.
HostGator seems to keep things centralized, and while their infrastructure is stable and reliable, I couldn’t find a way to change the data center location later.
So if server proximity is a top priority for you, HostGator might not be as accommodating as others like GoDaddy or Hostinger.
Hostinger Server Locations
Hostinger, on the other hand, impressed me right away with their global reach. During setup, I could choose from multiple data center locations, and the list is impressive:
- Europe: France, Germany, Lithuania, Netherlands, UK
- North America: Arizona, Massachusetts, New York
- South America: Brazil
- Asia: India, Indonesia, Singapore
- CDN-only POPs: Johannesburg, Sydney, Japan

That’s coverage across four continents, with multiple choices per region. And Hostinger lets you change your data center after setup using their built-in migration tool. You can either transfer your entire setup or reinstall your server in a new location (though reinstalling erases current data).
What stood out to me was how eco-conscious they are. Several of Hostinger’s data centers—like those in the US, Germany, Brazil, and the UK—run on 100% renewable energy, which adds a nice sustainability edge.
I also saw the option to pair your site with Hostinger’s CDN, which further improves content delivery no matter where your audience is located. This kind of flexibility and reach is a big win for performance.
GoDaddy, HostGator, and Hostinger Alternatives
| Provider | Overview | Expert & User Reviews | |
|---|---|---|---|
| Offers scalable hosting solutions with reliable servers, free domain and SSL, AI-powered WordPress tools, and 24/7 expert support | IONOS Review | Visit IONOS | |
| Delivers web, WordPress, VPS & dedicated hosting with reliable servers, built-in security, and enterprise-grade VPS options | Hosting.com Review | Visit Hosting.com | |
| Features shared, WordPress & VPS hosting with free domain, entry-level friendly plans, and eco-friendly green hosting initiatives | HostPapa Review | Visit HostPapa |
GoDaddy vs HostGator vs Hostinger: The Bottom Line
After testing everything myself—from signing up and installing WordPress to running performance benchmarks and chatting with support—Hostinger came out as the clear winner.
It’s faster, easier to use, and packed with features even on the lowest plan. You get daily backups, global servers, and great support without paying extra. It just delivers more, for less.
| Category | Winner | Why |
|---|---|---|
| Pricing and Plans | Hostinger | Best value with low prices, more features, and no aggressive upsells. |
| Support | HostGator | Fast live chat, helpful agents, and great onboarding—before purchase. |
| Hosting Features | Hostinger | Daily backups, free migration, and all features unlocked on all plans. |
| Website Performance | Hostinger | Fastest load times and lowest blocking with consistent GTmetrix scores. |
| Ease of Use | Hostinger | Clean hPanel, instant setup, and beginner-friendly from the start. |
| Privacy and Security | Hostinger | Complete security suite included—no need for paid add-ons. |
| Server Locations | Hostinger | More global data centers and flexibility to change location easily. |

