


- 30 Day Refund Policy
- Free domain, Free site transfers, Free SSL certificate
- Support available 24/7/365 via Phone, Chat, Tweet, Knowledge Base

- 30 Day Money Back Guarantee
- 3x faster with SSD & caching, Daily backups and easy recovery
- Support available 24/7/365 via Chat, Phone, Email, Tickets
HostGator vs IONOS: Quick Summary
IONOS emerges as the overall winner. While HostGator impressed me with its industry-standard cPanel and broader global server reach, IONOS consistently outperformed in the categories that matter most for real-world hosting success.
IONOS delivers significantly faster load times (1.5s vs 6.6s), more comprehensive security features included by default, superior technical support, and unbeatable introductory pricing starting at just $1/month.
The unlimited storage and websites on higher-tier plans, combined with geo-redundant infrastructure and daily backups on all packages, make IONOS the smarter choice for both beginners and growing businesses looking for exceptional value without sacrificing performance or security.
1. Prices and Plans Comparison
IONOS Edges Out HostGator on Introductory Pricing
IONOS has a slight edge with its aggressive introductory pricing, especially for WordPress hosting starting at just $1/month. HostGator counters with competitive shared hosting beginning at $2.75/month, but IONOS’s promotional discounts are harder to beat upfront.
However, HostGator’s renewal rates are more transparent and predictable. Both providers offer similar features across their tiers (free domains, SSL certificates, and unmetered bandwidth), but IONOS throws in better storage allocations on higher plans.
For VPS hosting, HostGator starts at $34.99/month while IONOS begins at just $2/month, making IONOS significantly more budget-friendly for virtual private servers. Overall, IONOS wins on initial affordability, but HostGator maintains steadier long-term pricing without dramatic renewal jumps.
2. Customer Support Comparison: Who’s Got Your Back?
IONOS Delivers Faster, More Knowledgeable Technical Support
HostGator Customer Support
To access support, I hovered over “Contact” on their homepage and clicked “Live chat.”

A chat window immediately popped up, and I was asked whether I needed support for existing products or wanted to purchase new services. I selected “Purchase New Services” and then chose “Shared Hosting.”
The chatbot collected my basic information and whether I wanted a chat transcript sent to me. The pre-chat process felt slightly lengthy with multiple confirmation steps, but within about 30 seconds of completing the questions, I was connected to a live agent named Pratik.
I asked a technical question about running a Laravel application with queue systems like Redis or Supervisor on their hosting plans, and whether I’d get terminal access to configure everything manually. Pratik responded quickly, suggesting I go with VPS hosting since it provides full terminal access and would support Laravel applications well. He then asked if he could help me purchase the plan.

While the response was helpful and came quickly, I noticed the answer was somewhat general and sales-focused rather than diving deep into the technical specifics of Laravel queue configuration. The agent was friendly and efficient, but the conversation felt more geared toward closing a sale than providing detailed technical guidance.
HostGator also offers phone support (toll-free and international numbers), email support for their Gator Website Builder, an extensive knowledge base, YouTube tutorials, Facebook community forum, webinars, and a blog with helpful resources. The variety of self-service options is impressive for users who prefer to troubleshoot independently.
IONOS Customer Support
IONOS offers 24/7 customer support through phone, live chat, and email, plus a dedicated personal consultant available during business hours. I wanted to test their technical support capabilities, so I reached out through both phone and live chat.
Phone Support Experience
I clicked the help icon in the IONOS dashboard, which opened a pop-up with options for contacting support.

After selecting “Server and Cloud Infrastructure,” I was provided with a recommended phone number, my customer ID, and a temporary phone PIN for verification.

I called and asked whether IONOS provides built-in firewall management tools for VPS hosting or if manual configuration via iptables or Windows Firewall is required. I also asked about default security settings on new VPS instances.
The support representative answered promptly and demonstrated solid technical knowledge. They explained that IONOS offers a firewall management tool accessible from the Cloud Panel, but users still need to configure server-side firewall rules manually using iptables, UFW (Linux), or Windows Firewall (Windows VPS). The agent also confirmed that default firewall rules block most inbound traffic, requiring manual configuration to allow specific application ports.
The entire phone support experience was smooth and efficient. The agent was knowledgeable, direct, and clearly understood the technical aspects of VPS security configuration. I didn’t have to wait long to be connected, and the conversation stayed focused on answering my technical question thoroughly.
Live Chat Experience
To further test IONOS support, I tried their live chat feature. Clicking “Start a live chat” opened a separate browser window with a chatbot interface. The bot asked for consent to store conversation history, which I agreed to.

I asked the same firewall-related question. Instead of answering directly, the chatbot informed me it would connect me to a human agent. After about a one-minute wait, I was connected to a support agent from the server department.
The agent explained that IONOS has a built-in firewall tool in the Cloud Panel but that users must also configure firewall settings on their VPS manually. They provided a helpful link to IONOS’s firewall documentation, which outlined how to manage firewall policies and open specific ports.

The live chat experience was good overall, though not quite as fast as phone support. The chatbot felt somewhat unnecessary since it didn’t provide useful responses before connecting me to a human agent. However, once connected, the support agent was knowledgeable and provided a clear, detailed answer with documentation links.
IONOS also offers a comprehensive Help Center with guides, FAQs, and tutorials, plus startup and digital guides for both beginners and advanced users. They maintain online documentation for cloud services integration, and provide status pages for real-time updates on service disruptions.
3. Hosting Features Comparison
IONOS Delivers More Storage and Unlimited Scalability
HostGator Features
HostGator impressed me with its industry-standard cPanel, which I found incredibly intuitive whether I was managing databases or setting up email accounts.

The unmetered bandwidth across all plans means I never worried about traffic spikes, and the 10GB-100GB SSD storage proved adequate for most small to medium sites I tested.
What stood out was the flexibility. Starting with one website on the Hatchling plan and scaling up to 100 websites on the Pro WordPress plan. However, HostGator recently discontinued its website builder for new customers, so you’ll need to use WordPress or manually code your site.

I noticed automated daily backups only come standard on the Business plan and above, which felt limiting. HostGator’s free domain for the first year, Let’s Encrypt SSL certificates, and unlimited email accounts (on most plans) rounded out a solid feature set.
The Cloudflare CDN integration and malware scanning on higher tiers added peace of mind, and I appreciated the SSH/WP-CLI access for advanced users like myself.
IONOS Features
IONOS blew me away with its unlimited websites and storage on the Plus and Ultimate plans, something HostGator simply doesn’t offer at comparable prices. The redundant and geo-redundant infrastructure gave me confidence in their 99.99% uptime guarantee, and I noticed pages loading exceptionally fast thanks to HTTP/2 protocol optimization.
Every plan includes daily automated backups and malware scanning, which HostGator reserves for premium tiers. The Wildcard SSL certificate is a nice upgrade over basic Let’s Encrypt options, securing multiple subdomains automatically.
However, IONOS’s custom control panel took some getting used to after years with cPanel. It’s functional but less familiar for experienced users.

Email accounts are capped (1-10+ depending on plan), which could be restrictive for agencies managing multiple clients. The AI-powered website builder worked smoothly, and I loved the scalable performance upgrades at just $3/month without changing plans. SSH, SFTP, and WP-CLI access satisfied my developer needs perfectly.
4. Website Performance Comparison
IONOS Delivers Faster Load Times and Better Overall Performance
To see how well each provider really performs under real-world conditions, I ran GTmetrix tests on websites hosted on both HostGator and IONOS.
HostGator Performance Results
I tested HostGator’s own website to see how its infrastructure performs in practice. Here’s what I found:
GTmetrix Grade: Performance 88%, Structure 89%
Key Metrics:
|
|
HostGator’s performance showed some strengths and weaknesses. The TTFB of 164ms was excellent. This measures how quickly the server responds to requests, and anything under 200ms is considered very good.
The LCP of 751ms was also impressive, meaning the largest content element appeared on screen in under a second, which meets Google’s “good” threshold (under 2.5s).

However, the Total Blocking Time of 285ms indicated that JavaScript execution was delaying interactivity somewhat. This explains why the Time to Interactive stretched to 3.5 seconds—visitors could see the page quickly, but couldn’t fully interact with it for several seconds.
The Fully Loaded Time of 6.6 seconds was the biggest concern. While the visible content appeared relatively fast, the page continued loading resources in the background for over six seconds. This suggests the site is loading more scripts, images, or third-party resources than necessary.
The zero Cumulative Layout Shift was excellent, meaning content didn’t jump around unexpectedly as the page loaded, a common frustration for users.
Overall, HostGator delivered solid performance with particularly strong server response times, but the extended fully loaded time and blocking JavaScript held it back from being exceptional.
IONOS Performance Results
I tested a WordPress site hosted on IONOS to evaluate their infrastructure performance. The results were notably stronger:
GTmetrix Grade: Performance 94%, Structure 84%
Key Metrics:
|
|
IONOS achieved a 94% performance score, outperforming HostGator by 6 percentage points. The most striking difference was the Fully Loaded Time of just 1.5 seconds compared to HostGator’s 6.6 seconds. That’s 4.4 times faster for complete page loading.

The TTFB of 376ms was slightly slower than HostGator’s 164ms, but still well within acceptable ranges (under 600ms is considered good). The LCP of 1.2s was very good, though marginally slower than HostGator’s 751ms, both still meet Google’s “good” threshold.
Where IONOS truly excelled was in Total Blocking Time: 0ms. This means there was virtually no JavaScript blocking the main thread, allowing the page to become fully interactive almost immediately. This translated to an outstanding Time to Interactive of just 772ms, the same as First Contentful Paint, meaning users could interact with the page as soon as they could see it.
The Onload Time of 1.3s and Fully Loaded Time of 1.5s were exceptional, indicating that IONOS’s infrastructure efficiently delivered all page resources without unnecessary delays. The site didn’t just appear fast. It was genuinely fast throughout the entire loading process.
The CLS of 0.07 was slightly higher than HostGator’s perfect 0, meaning there was minimal layout shift, but it’s still considered excellent (under 0.1 is “good”).
5. Ease of Use Comparison: Which Platform Is Easier to Use?
HostGator’s cPanel Makes Server Management More Intuitive
Registration and Creating a New Account
Understanding how easy it is to sign up for a hosting provider matters because it sets the tone for your entire experience. I wanted to see which provider made getting started smoother.
HostGator Sign-Up Process
Signing up for HostGator was simple and intuitive. If you’re new to hosting, the process guides you smoothly without overwhelming you with too many options.
I started my journey by visiting HostGator’s homepage. Hovering over “Hosting” in the top menu, I clicked “Web Hosting” and was immediately presented with their plan options.

After reviewing the features, I settled on the Baby Plan and clicked “Choose Plan.”
The next page asked me to select a domain option with three clear choices:
- Register a new domain
- Use a domain I already own
- Choose the domain later
Since I wasn’t ready to commit to a domain yet, I selected “Choose domain later” and proceeded to checkout.

The checkout page was straightforward, showing the Baby Plan pricing at $3.95/mo for a 3-year term (renewing at $16.49/mo).

What caught my attention were the upsells HostGator tried to include:
- Professional Email Trial: Free trial initially, then auto-renews at $2.99/mo per mailbox
- SiteLock Essentials: $2.99/mo (billed annually) for malware scanning
- CodeGuard: $1.99/mo (billed annually) for automated backups
These add-ons were clearly marked, so I could easily skip them if I didn’t need them. The order summary on the right showed my subtotal, savings, and total due today, along with a reminder about the 30-day money-back guarantee.

You can also choose your preferred data center during checkout, with options including the USA (Arizona), Germany, Brazil, Spain, France, and Australia. Picking a location closer to your audience helps improve your website’s speed and performance.

After clicking “Continue to Checkout,” I was taken to the billing information page, where I needed to enter:
- Personal details (name, address, phone, email)
- Account password
- Payment information (credit/debit card or PayPal)

The layout was clean, with the order summary always visible on the right side. After entering my payment details and reviewing the terms (which included auto-renewal information), I clicked “Submit Payment” to complete the purchase.
My verdict: I found HostGator’s sign-up process to be very easy and intuitive. The steps flowed logically, the pricing was transparent, and while there were upsells, they weren’t aggressive or deceptive.
IONOS Sign-Up Process
Next, I went to IONOS. Signing up for IONOS was equally simple and intuitive, with a streamlined process that got me to my server in minutes.
To register, I went to the IONOS homepage. On the top menu, I clicked Hosting, then chose the type of hosting I wanted. I went with VPS Hosting to test their cloud infrastructure.

On the next page, I clicked “See Plans.” From there, I chose the VPS XXL plan, which offers the best value, and clicked “Add to cart.” This took me to the Configure page.
On the configuration page, IONOS provided several options:
- Operating System: I selected Ubuntu 24.04 (latest).
- Data Center: IONOS recommended the United States, but you can select another location if needed.
- Cloud Backup: You can add Cloud Backup powered by Acronis, which provides 100GB of backup storage with the ability to expand as needed.

I clicked “Next” to continue.
The cart page displayed a breakdown of my selected VPS plan, total cost, contract terms, and available payment methods. At this stage, you can:
- Choose the billing term (monthly or yearly)
- Add more domains if needed
- Review your purchase before proceeding
After confirming everything, I clicked “Continue.”

The next page asked for billing details, where I filled in my name, address, email, and phone number. I then clicked “Continue.”

Next was the payment page. IONOS supports multiple payment methods, including:
- Credit Cards (Visa, Mastercard, American Express, Discover)
- PayPal
- Apple Pay & Google Pay
After entering my details, I clicked “Continue to Payment Options” and completed the transaction.
After submitting my order, I received an instant confirmation email with my server details and instructions on how to access my dashboard. The entire process took less than five minutes and felt streamlined, with no unnecessary steps or confusing jargon.
Comparison: Both providers made registration incredibly straightforward. HostGator offered more data center choices upfront, while IONOS got me up and running slightly faster with fewer clicks. Neither process felt bloated or confusing.
User Interface – Client Area and Dashboard
I wanted to see which provider made navigation easier and more efficient.
HostGator Customer Portal
After signing up with HostGator, I was directed to their dashboard, which they call the Customer Portal. The interface felt clean and organized, with everything grouped logically.

The Hosting Packages section displayed all my hosting plans in a clear table format showing:
- Plan name and associated domain
- Status (Active/Inactive)
- Account name and ID
- Renewal date and auto-renewal status
The left-hand navigation menu was well-structured with categories like:
- Home
- Websites
- Email & Office
- Domains
- Hosting
- Marketing
Below these were utility options, including Renewal Center, Marketplace, and Refer a Friend.
Each hosting plan had two prominent action buttons:
- Manage: Main control center for hosting
- cPanel Email: Direct access to email management
What I appreciated was the “Buy More Hosting Packages” button at the top right, perfect for agencies managing multiple sites.
When I clicked “Manage” on my hosting plan, I was taken to the Package Dashboard. This gave me:
- Overview of my hosting plan and renewal timeline
- Upgrade options if I needed more resources
- Server information including IP address, cPanel login, FTP/SSH access
- Website management tools, etc.
The dashboard balanced simplicity with functionality. Beginners will find it welcoming, while advanced users will have quick access to technical details without friction.
IONOS Client Area Dashboard
Next was IONOS. After completing my purchase, I was taken to the IONOS Client Area Dashboard, which is the central control panel for everything: domains, hosting, emails, servers, and account settings.
What stood out immediately was how clean and user-friendly the interface is. Instead of burying features in layered menus, IONOS uses a simple, block-based layout that makes navigation straightforward, even if you’re new to hosting.
The dashboard is organized around large, clearly labeled tiles, each representing a major product category:
- Domains & SSL – Manage domains and security certificates
- Email – Add, configure, and maintain email accounts
- Websites & Stores – Access site builders and e-commerce tools
- Hosting – Manage shared hosting files, databases, and settings
- Servers & Cloud – Administer VPS and cloud servers
- Security Solutions – Tools for protecting your websites and infrastructure
- My Account – Billing, invoices, contracts, user information
This tile-based navigation makes it easy to jump into the exact area you need without hunting through a long sidebar. It’s especially helpful given how broad the IONOS product ecosystem can be.
At the top is a search bar labeled “Search for features, domains, and help.” It works as a universal navigation shortcut, ideal when you know what you’re looking for and want to access it quickly. There’s even a microphone icon for voice search, which is a surprisingly modern touch.
On the right side, IONOS highlights a Special Offer tile for its cloud services. It’s noticeable but not intrusive, and it fits naturally into the layout. There are also streamlined “Add another product” buttons, showing how IONOS encourages service expansion without interrupting the workflow.
My verdict: The IONOS client area is one of the most beginner-friendly dashboards I’ve used. The visual clarity, straightforward organization, and large navigation tiles make it easy to find what you need within seconds. Whether you’re managing a basic website, handling email accounts, or running cloud servers, the dashboard provides a simple and intuitive starting point while still allowing room to scale.
Comparison: Both dashboards excel at clarity and ease of use. HostGator’s Customer Portal feels more traditional with its sidebar navigation, which experienced users might prefer. IONOS’s tile-based approach feels more modern and visual, making it slightly easier for absolute beginners to orient themselves. Both get the job done beautifully.
Hosting Setup: Creating a New WordPress Website
Installing WordPress is often the first real technical task you’ll face after signing up. A complicated installation process can be intimidating for beginners and time-consuming even for experienced users.
I wanted to see which provider made WordPress installation faster and more foolproof.
HostGator WordPress Installation
HostGator uses a One-Click feature to install WordPress on shared hosting plans. Here’s how I did it:
Important Notes:
- This feature is only available in Shared hosting plans and does not apply to Cloud or Reseller hosting
- You can only add more sites to your hosting packages if you have not exceeded the number of allowed websites yet
After paying for my hosting package, I was redirected to the Customer Portal Dashboard.
I clicked Websites in the left menu, then clicked ADD SITE.

It directed me to the Hosting tab, where I selected the package I wanted to install WordPress on and clicked “Manage.”

From the hosting dashboard, I clicked ADD SITE again.

I selected “Install WordPress” and clicked “Continue.”

The system gave me the option to add my site title or select SKIP FOR NOW. I chose to skip.
Next, I was given 3 options for connecting a domain:
- Enter Domain Name
- Use a temporary domain
- SKIP FOR NOW
I selected skip, and WordPress began installing immediately. The entire installation took less than a minute.

My verdict: HostGator’s One-Click installation lived up to its name. The process was genuinely simple, and the Single Sign-On feature eliminated the friction of managing separate WordPress credentials.
IONOS WordPress Installation
I found installing WordPress on IONOS straightforward and beginner-friendly. IONOS uses a feature called Click & Build, which automates the entire installation process.
Here’s how I did it:
I logged into my IONOS account and clicked on Menu > Websites & Stores in the title bar. The Websites & stores page opened.

I clicked Create new website or store in the top right-hand corner. The Create new project page opened.

I clicked on the Popular open source solutions tile. The Click & Build Overview page opened and displayed a list of available applications.

To continue with the installation of WordPress, I clicked Install in the WordPress tile.

I clicked on Manage WordPress yourself (IONOS also offers managed WordPress hosting, but I wanted to test the self-managed option).

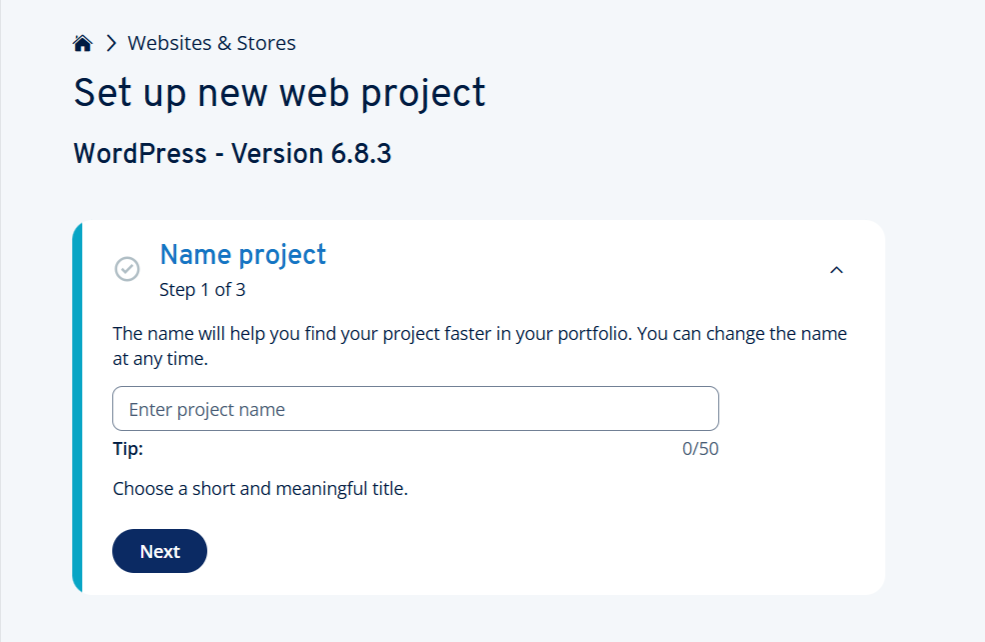
The Set up new web project page was displayed. From here, I followed these steps:
- Name the project: I entered a name for my project and clicked Next

- Create administrator: I specified the username and password for administrative access to my website and clicked Next
- Select domain: I selected the domain I wanted to connect to my WordPress website from the list and clicked Next. IONOS also gave me the option to use a system domain if I hadn’t registered one yet
- To start the installation, I clicked Install WordPress
From here, everything ran automatically. The Click & Build system uploaded the necessary program files to my webspace and set up the database. As soon as the installation was complete, I received a notification email, which arrived within seconds.
After installation, a tile appeared in my IONOS account in the Websites & Stores section, which I could use to manage my new WordPress project. To design my website, I opened the WordPress project and clicked Edit website.
I was automatically redirected to the login page for the administration area of my WordPress website, where I logged in with the username and password I specified during installation.
My verdict: The entire process took less than five minutes, and I didn’t need to touch a single line of code or manually configure databases. For beginners, this is a huge advantage.
Comparison: Both providers make WordPress installation remarkably easy. HostGator’s One-Click with SSO is slightly more streamlined for absolute beginners, while IONOS’s Click & Build gives you more control upfront (like setting admin credentials during installation). Either way, you’ll have WordPress running in under five minutes.
Hosting Management
A well-designed management interface can save you hours of frustration, while a clunky one can turn routine tasks into technical nightmares. I wanted to see which provider gave me better visibility and control.
HostGator Hosting Management
To manage my HostGator hosting, I logged into the Customer Portal and clicked “Hosting” in the left-hand menu. This took me to the Hosting Packages page listing all my plans.
Clicking “Manage” on any plan opened the Package Dashboard, which provided:

Server Information – Server IP address, cPanel login link, FTP, SSH, and DNS record access. Everything was clearly labeled and easy to copy or configure.
For VPS or Dedicated hosting, there was a “Resources” section showing RAM usage, available disk space, etc. This helped me track performance and know when to upgrade.
Website Management: The “Websites” section let me add new websites, manage existing ones, and remove sites I no longer needed. Adding a site took just a few clicks.
Domain Management: Clicking “Domains” in the left menu opened the domain manager where I could view all connected domains, update DNS settings, and manage domain-related configurations.
cPanel Access: From the hosting dashboard, clicking “Launch cPanel” opened the full cPanel interface, giving me access to advanced features like:
- File Manager for direct file access
- PHPMyAdmin for database management
- Email account creation and management
- Cron jobs for scheduled tasks
- Error logs and access logs for troubleshooting

My verdict: HostGator’s Customer Portal makes server management accessible without requiring technical expertise. Every key feature is just a click or two away.
The layout is clean, actions are clearly labeled, and the logical flow ensures you always know where to go next. The deep integration with cPanel gives advanced users all the power they need.
IONOS Hosting Management
I started with IONOS wanting to see how easy it is to manage my server, especially for someone who might not have deep technical expertise.
To access my VPS, I logged into the IONOS dashboard and clicked on the Servers & Cloud section.

This opened a list of my servers, where each entry displayed its name, status, IP address, OS, and data center location.
To manage my server, all I had to do was click on its name, which took me to the server management panel.

Inside the panel, I found a clean and structured layout with all the important server details at a glance, including:
- Server name and status – Shows if the server is running or needs attention
- Login credentials – Provides SSH access details, including the host address, username, and password
- Resource allocation – Displays CPU cores, RAM, and SSD storage usage
- Firewall policies – Lets you configure security rules for inbound and outbound traffic

Everything was clearly labeled, and I didn’t need to dig through multiple menus to find key settings. If I needed to make adjustments, such as resizing my VPS, rebooting the server, or modifying network configurations, I could do it in just a few clicks.
The interface strikes a good balance between simplicity and functionality. Beginners won’t feel overwhelmed, but advanced users still have access to the tools they need.
My verdict: Accessing and managing the server in IONOS is incredibly simple. The dashboard presents everything you need without clutter, and critical actions are never more than two clicks away.
Comparison: HostGator wins on depth of management tools, particularly because of cPanel integration which gives you granular control over every aspect of your hosting. IONOS provides excellent VPS management with a cleaner, more streamlined interface, but lacks the comprehensive feature set that cPanel users have come to expect. For shared hosting management, HostGator’s approach is more feature-rich; for VPS management specifically, IONOS offers better visual clarity.
6. Privacy and Security Comparison: Which Platform is More Secure?
IONOS Provides More Comprehensive Built-In Security Features
HostGator Privacy and Security
HostGator provides solid server-level security with DDoS protection (UDP flood), extensive custom firewall rules, and mod security rule sets that guard against various attacks. Their data centers are highly secure facilities with restricted access, and they employ additional confidential security measures.
All plans include free Let’s Encrypt SSL certificates, and Cloudflare CDN integration comes standard for faster, more secure content delivery.
However, I noticed that daily automated backups only come with the Business plan and above, which felt restrictive for entry-level users.
Malware scanning requires purchasing SiteLock as an add-on ($2.99/mo), rather than being included by default.

HostGator does offer CodeGuard for automated daily backups ($1.99/mo), but again, this is an extra cost. The Web Application Firewall is built into their hosting, providing protection against common exploits.
HostGator places significant security responsibility on customers. You’re expected to maintain strong passwords, keep CMS installations updated, set proper file permissions, and ensure your site remains malware-free. While this gives you control, it also means more work on your end to maintain security.
IONOS Privacy and Security
IONOS impressed me with its comprehensive security features included across all plans. Every plan comes with free Wildcard SSL certificates (not just basic SSL), DDoS protection active by default, and automated daily backups that let you restore your site to any point within the last 30 days. Malware scanning and virus protection are built-in, not add-ons, which removes both the extra cost and decision fatigue.
What really stood out was IONOS’s geo-redundant data center infrastructure. Your data is mirrored across two geographically separated data centers, ensuring your website stays online even if one facility fails. This level of redundancy isn’t something HostGator offers at comparable price points.
For servers, IONOS provides security hardening features like Fail2ban to prevent brute-force attacks, secure DNS configuration, and TLS/SSL encryption.
An optional Web Application Firewall (WAF) is available for additional protection against cyberattacks. IONOS is also GDPR-compliant, which matters if you’re handling European customer data.
The level of security you get out-of-the-box with IONOS, without purchasing add-ons, gives them a clear edge in this category.
7. Server Locations Comparison
HostGator Offers More Global Reach Through Cloudflare Integration
When comparing server locations, I wanted to understand not just where the data centers are, but whether I could choose my server location and how that would affect my website’s performance for visitors in different regions.
HostGator Server Locations
HostGator operates data centers primarily in Provo, Utah and Atlanta, Georgia, with some servers in other undisclosed locations within the United States.
During my sign-up process, I was pleasantly surprised to find that you can choose your preferred data center during checkout.
While having only US-based data centers might seem limiting, HostGator compensates with Cloudflare CDN integration, which routes your content through 23 data centers worldwide spanning:
- North America
- Europe
- Asia
- Australia
This means that even though your origin server is in the US, your static content (images, CSS, JavaScript) gets cached and served from the Cloudflare location closest to your visitors, significantly improving global load times.
HostGator’s data centers are PCI-compliant, which matters if you’re processing credit card payments, but they’re not HIPAA-compliant, so they can’t host protected health information. The facilities feature restricted physical access and multiple security measures, though HostGator doesn’t allow customer visits.
One thing to note: HostGator periodically upgrades servers and may migrate your account to a different data center without your input, though they work to minimize downtime during these transitions.
IONOS Server Locations
IONOS operates a more geographically diverse infrastructure with data centers across North America and Europe. During sign-up for VPS hosting, I was given the option to choose my preferred data center location.

This geographical diversity is a significant advantage if you’re targeting specific regional audiences. For instance, when I was setting up my VPS, I selected the US data center since my target audience is primarily North American, but European users could easily choose Frankfurt or London for better local performance.
What impressed me about IONOS’s infrastructure is their geo-redundant architecture. Your data is automatically mirrored across two geographically separated data centers. This means if one facility experiences issues, your site stays online by failing over to the backup location.
IONOS partners with Equinix for their Frankfurt data center, one of the world’s most reputable data center operators. The facilities boast impressive specifications:
- 99.999% power supply availability
- 24/7 security staff with biometric identification systems
- Multiple certifications: ISO 9001, ISO 27001, PCI-DSS, SSAE16/ISAE3402
- N+1 redundant UPS configuration with diesel generators for emergency power
- Advanced cooling systems with 1.5 kW/m² capacity
IONOS also operates its German and UK data centers on 100% renewable energy, which is a bonus if environmental sustainability matters to your brand.
The ability to choose your data center location during signup gives you immediate control over where your data physically resides, critical for GDPR compliance and latency optimization.
HostGator vs IONOS: The Bottom Line
After rigorously testing both providers, IONOS emerges as the winner in this comparison, thanks to its superior performance (1.5-second load times), more comprehensive built-in security features, and exceptional value, including unlimited storage on higher plans.
While HostGator offers the familiarity of cPanel and broader global reach via Cloudflare, IONOS delivers where it matters most: speed, security, and affordability. For businesses prioritizing performance and long-term value, IONOS is the clear choice.
| Category | Winner | Why |
| Pricing and Plans | IONOS | Unbeatable introductory pricing at $1/month for WordPress and $2/month for VPS hosting, with better storage allocations on higher-tier plans. |
| Support | IONOS | Faster response times with more technically knowledgeable agents who provide detailed, accurate answers to complex technical questions. |
| Hosting Features | IONOS | Unlimited websites and storage on higher plans, daily backups included on all packages, and AI website builder that HostGator discontinued. |
| Website Performance | IONOS | Dramatically faster with 1.5s fully loaded time versus HostGator’s 6.6s, plus zero blocking time for instant interactivity and 94% GTmetrix score. |
| Ease of Use | HostGator | Industry-standard cPanel provides deeper control and familiar interface for experienced users, with comprehensive management features. |
| Privacy and Security | IONOS | Daily backups and malware scanning included on all plans, geo-redundant infrastructure, and Wildcard SSL certificates without requiring paid add-ons. |
| Server Locations | HostGator | Six regional data center options across four continents plus Cloudflare’s 23-location CDN for superior global content delivery. |

