
Amazon has rapidly grown to become one of the internet giant in providing services in e-commerce. Amazon Web Services is an example of an advanced set of computer-based services offered by Amazon.
In this guide, we will look at how to set up Virtual Private Server (VPS) with Amazon Web Services (AWS) EC2.
As a way to reward new users, AWS offers a “free tier” of service that provides a Virtual Private Server “micro instance” at zero cost for one year. AWS offers adequate time to run the micro instance. However, if users want more services, they can create several micro instances and run them simultaneously.
Step 1: Setting up an AWS account
Go to http://aws.amazon.com and sign up for an AWS account.

Follow the steps provided on the website to set up an AWS user account.
Step 2: Set up a free instance
Using your Amazon username and password, login into the AWS console page.
Then choose the datacenter location where your free instance will be created.

Step 3: Use the Elastic Compute Cloud (EC2)
Login to the Member’s Dashboard, click AWS and choose EC2 to access the service.

Step 4: Choose your base image
Hit the “Launch Instance” button to see all the available instance types. You can also opt to upload your own image.

Step 5: Select Amazon Machine Image (AMI)
Amazon AWS provides a range of operating systems such as Linux, Windows, Redhat, and Ubuntu.
So, ensure you choose the right OS system depending on your specifications. Then select the “Free-tier only” option to see the images available for the micro-instance option you’ve selected.

When selecting an instance, be keen to find out if its HVM instance or PV instance. Most users prefer to use the HVM, but if you want to know the difference between HVM and PV instances, see the AWS virtualization types section.
Step 6: Choosing instance type
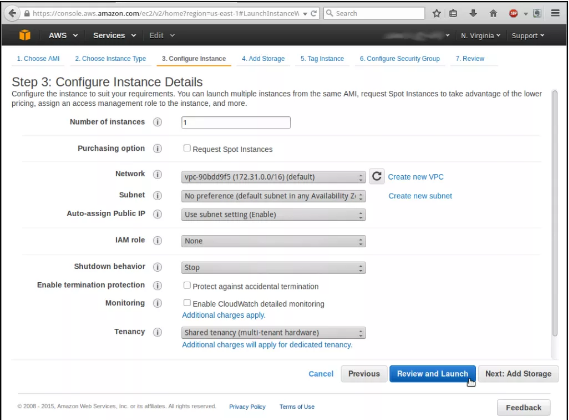
Select the default option instance Type t2.micro which is an eligible free tier. Click on the “Next: Configure Instance Details” button to proceed to the next stage.

Hit the “Review and Launch” button.
Then go ahead and click Add Storage.

Proceed to edit your storage section and put what you want. Then move on to the Tag Instance.

In this section, create your choice of Tags. Then go to Configure Security Group.

In this section, you have the option to create a name for the Security Group you want with a description for easy retrieval of information the next time you need it.
Don’t forget to add Rule SSH, HTTP, and HTTPS as we want the VPS to work as a web server.
Step 7: Launch the instance
Check the page settings and hit the “Launch” button. Ignore the security warning that pops up.

This page will ask you to check your page settings from the starting point. If you there is an error, you can go back to the exact page and correct it.
Step 8: Select a key repair
Before you finish the process of launching VPS on AWS, a dialogue box will pop-up requiring you to select a key repair you will use for instance. This helps to identify the actual user of SSH to connect to instance when it’s running.
A key pair is made up of a public key stores by AWS, and a private key stored by the user. These two features allow the user to have a secure connection on instance.
From the menu, click the “Create a new key pair” button and name your key pair.
Then download the file and save it into a secure location.

It is important to note the file you choose to store your pair of key for easier access when you need it in future. You can store it in my Documents folder.
Then hit the “Launch Instances” option.
Step 9: Set up secure permissions for the key file
SSH will not allow access to the key pair file created unless there are secure file permissions.
Head over to the File Manager, right-click on this file and choose Properties from the menu. A dialogue box will pop-up, click on the Permissions tab. The access permissions should be “Read Only.” The group section should be marked as “None,” and the same should be done for others access.
Then, click the “Close” button.

You can also enter the command below to get the same results.

Step 10: Manage the instances
Once you launch the instances, go ahead and start managing them. Hit the “view Instance” button as shown below:

In the AWS Console, you should see the instances you’ve created. In this case, you may notice there are two instances, where one was created earlier while the next one is in its initial stage.

Be patient until the instances status turns to “running,” then go ahead and log in.
Step 11: Logging in to the Virtual Private Server (VPS)
Using the SSH protocol, it’s now easier to log into a running instance. Linux and Mac Operating Systems come with a built-in SSH. For Windows, you may need to install the free Putty program to access the instance.
To access the VPS, you need to know the IP address of your instance. To identify this, click the checkbox near the instance to see all the information about it as shown below:
Note that if you stop the instance and restart, a different IP address will be assigned to it.
Using SSH Service
Using the key pair file generated earlier, login to instance. If you’re using Ubuntu, then enter the command below:
$ ssh -i ~/Documents/filename ubuntu@54.175.34.164
The user id used on the instance is Ubuntu (default). You may see a security warning but just ignore it and click “yes.”

Now you should have Ubuntu running successfully on VPS on AWS.
To stop the instance to avoid consuming all the free hours provided, follow the following process:
Select the running instance and hit the “Actions” button. Then select “Instance State” from the menu and click “Stop.”

A pop-up window will show so that you can confirm the process.

Conclusion
Congratulations, now you have created a free VPS on AWS and you can access it easily using SSH. We hope this guide was helpful in simplifying the process.
Check out the top 3 Cloud hosting services:
- If you want to get the best cloud hosting, click here and get the suitable one.

