
Installing and configuring MongoDB on your Ubuntu 22.04 is a simple task that should not take much of your time. However, some steps may be intricate for newbies, so we compiled this guide. This tutorial will help you learn how to install and configure MongoDB 5.0.9 on your Ubuntu 22.04.
Prerequisites:
- Before we embark on our endeavor, confirm that you have the following:
- The tutorial requires Ubuntu 22.04 server
- Root privileges
- A fully-configured firewall
What is MongoDB?
MongoDB is a document-centric NoSQL database program distinguished for its exceptional performance. It is a free, open-source solution published under the GNU Affero General Public License (GPL) and is commonly used in modern-day web applications. The application manifests the top qualities of a distributed database at its core. Therefore horizontal scaling, geographical distribution, and high availability are built-in.
MongoDB is written in C++ language and stores data in a format called Binary JSON (BSON). The flexible JSON-like documents mean the data fields can vary from one document to the other, and the structure can be modified over time. In addition, the database only offers unique packages for 64bit Long-term Support (LTS) Ubuntu releases. For example, the latest Ubuntu 22.04 (Jammy Jellyfish), Ubuntu 20.04 (Focal Fossa), Ubuntu 18.04 (Bionic Beaver), Ubuntu 16.04 (Xenial XERUS), and Ubuntu 14.04 (Trusty Tahr).
MongoDB Pros and Cons
| Pros | Cons |
| It stores almost all data in the RAM, which allows for faster performance | Joining documents is tedious because MongoDB doesn’t support joins as a relational database |
| It is simple and easy to understand | It performs at low speeds when indexing is done incorrectly |
| The setup process is straightforward and quick | It limits document size to 16 MB per document |
| It operates on a dynamic schematic architecture that is compatible with non-structured data and storage | Performance nesting for documents is limited to 100 levels |
| It uses sharding with large datasets | It demands a large amount of storage because of the lack of joins functionality, which results in data duplication |
| It uses horizontal scalability | |
| It offers an advanced ad-hoc queries feature | |
| It offers accurate documentation and doesn’t tether with the data when it processes it | |
| It offers expert customer support |
Installing MongoDB: Overview
| Part One: Installing MongoDB | Step 1: Install Dependencies Step 2: Create a MongoDB repository Step 3: Import the GPG public key Step 4: Update the repository Step 5: Install MongoDB |
| Part Two: Configuring MongoDB username/password | Step 1: Open the mongo shell Step 2: Change the database administrator Step 3: Create a root user Step 4: Enable MongoDB authentication Step 5: Restart MongoDB |
| Part Three – Managing The Newly Installed MongoDB Service | Status Check To Stop MongoDB To Start MongoDB To Restart MongoDB |
| Part Four: Adjusting the Firewall Settings | Allow UFW to port 27017 |
Part One: Installing MongoDB
Step 1: Install dependencies
First, install mongodb dependencies by using this command:
$ sudo apt update

$ sudo apt install dirmngr gnupg apt-transport-https ca-certificates software-properties-common

Step 2: Create a MongoDB repository
Once you import the key, the next step is creating a list file for MongoDB in ‘/etc/apt/sources.list.d/’. Run the command below:
$ echo "deb [ arch=amd64,arm64 ] https://repo.mongodb.org/apt/ubuntu focal/mongodb-org/5.0 multiverse" | sudo tee /etc/apt/sources.list.d/mongodb-org-5.0.list

Step 3: Import the GPG Public key
The Ubuntu advanced package tool (package manager apt) requires the GNU Privacy Guard (GPG) of the software distributor to authenticate and ensure consistency of the package. For this reason, the first step when installing MongoDB is importing the GPG key to your Ubuntu server. Run the following command to import the key:
$ wget -qO - https://www.mongodb.org/static/pgp/server-5.0.asc | sudo apt-key add -

Step 4: Update the repository
By now, you have the repository for your MongoDB 5.0. Next, you should issue an update command to allow Ubuntu to read packages from the newly created repository. To update the repository, run the following apt command:
$ sudo apt-get update
That’s it, the stage is set for MongoDB installation.
Step 5: Install MongoDB
Now, type the following command to initiate the installation of MongoDB from the repository:
sudo apt-get install -y mongodb-org

In a while, mongodb will be installed completely on your system.

If you receive an error of missing packages then, you will run these commands to resolve this error:
$ echo "deb http://security.ubuntu.com/ubuntu impish-security main" | sudo tee /etc/apt/sources.list.d/impish-security.list

$ sudo apt-get update

$ sudo apt-get install libssl1.1

Now, install mongodb using this command:
$ sudo apt-get install -y mongodb-org
After completing the installation display the installed version:
$ mongo --version

# sudo nano /etc/systemd/system/mongodb.service
Then copy and paste the text below:
[Unit]

Description=High-performance, schema-free document-oriented database

After=network.target

Documentation=https://docs.mongodb.org/manual

[Service]

User=mongodb

Group=mongodb

ExecStart=/usr/bin/mongod --quiet --config /etc/mongod.conf

[Install]

WantedBy=multi-user.target

Press Ctrl + O to save the file and Ctrl + X to close it. Next, update the systemd to incorporate the newly created service, then enable and induct the service.
The MongoDB apt installer will automatically starts the mongodb service on your system. Alternatively, you can also enable and restart MongoDB service by using the following commands:
# sudo systemctl daemon-reload

 # sudo systemctl enable mongod

 # sudo systemctl start mongod

Confirm the service is running using the following command:
# systemctl status mongod

Part Two: Configuring MongoDB username/password
By now, you have installed all the packages of MongoDB. Then next is configuring the username and password for your database server.
Step 1: Open the mongo shell
Before setting up the username and password, you must open the MongoDB shell for your database server. Type in:
# mongo

If you get the error:
Failed global initialization: badvalue invalid or no user locale set. Please ensure LANG and/or LC_* environment variables are correctly set.
Then use the command below;
export LC_ALL=C

mongo
Step 2: Change the database administrator
Once you are logged in the shell, type the command below to switch to the administrator database:
>use admin

Step 3: Create a root user
Now you can create an admin username, then create its password. Use the following command to achieve this:
db.createUser({user:"admin", pwd:"admin123", roles:[{role:"root", db:"admin"}]})From the command above, it is clear you have created a user called admin with a password set as admin123. The user has the role/permission as the root user, whereas the database is the admin.
The command above will give the following output:

Exit the MongoDB shell by typing exit.
Step 4: Enable MongoDB authentication
Locate and open the ‘/lib/systemd/system/mongod.service’ using your nano editor:
# sudo nano /lib/systemd/system/mongod.service
On the ExecStart line, include an optional argument line:
ExecStart=/usr/bin/mongod --quiet --auth --config /etc/mongod.conf
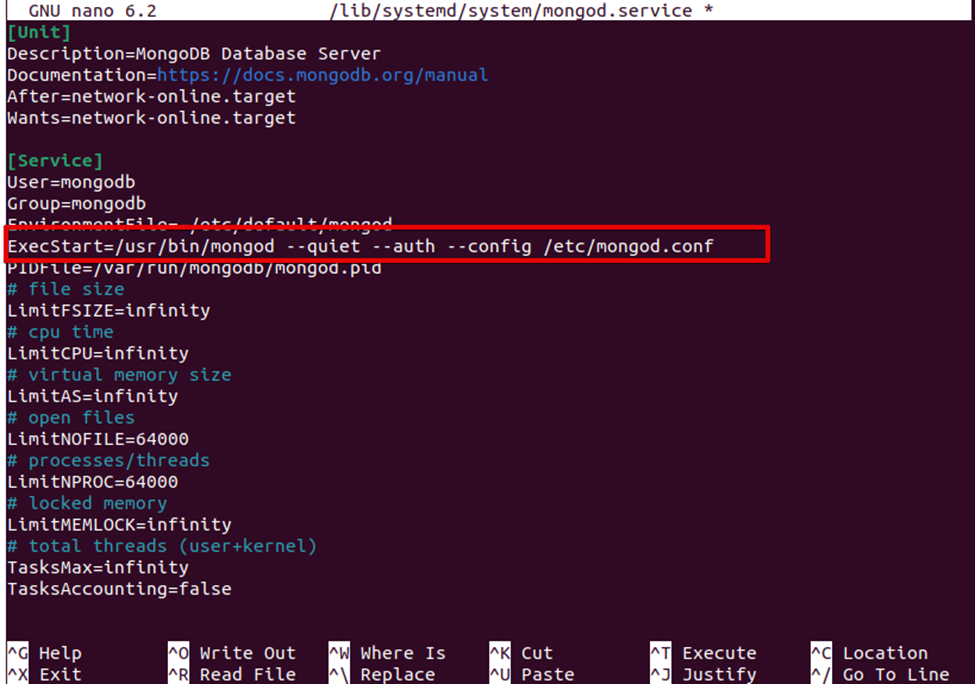
Press Ctrl+O to save and Ctrl+X to exit nano.
Next, update the system to incorporate a new version of the adjusted service file.
systemctl daemon-reload
Step 5: Restart MongoDB

Now restart MongoDB to enable all the changes made to take effect. Use the following command:
# sudo systemctl restart mongod
Then run the command below to connect to the shell:
# mongo -u admin -p --authenticationDatabase admin

You will be requested to enter the password as set above. Once you are logged into the MongoDB shell, verify that you are the authenticated user you created above. Run the following command:
> db.runCommand({connectionStatus : 1})You will get the following output:

That is it!
Part Three – Managing The Newly Installed MongoDB Service
Once MongoDB has been fully installed, it manifests as a systemd service which means it can be managed using the systemd command. The following are the systemd commands to use to manage MongoDB:
Status Check
To check the status of the MongoDB service, run the command below:
$ sudo systemctl status MongoDB
To Stop MongoDB
MongoDB database server can be stopped anytime by running the following command:
$ sudo systemctl stop MongoDB
To Start MongoDB
On the other hand, the service can be started by running the command below:
$ sudo systemctl start MongoDB
To Restart MongoDB
Additionally, the MongoDB database server can be restarted with a single command:
$ sudo systemctl disable mongodb
And to enable MongoDB, you can run the command below:
$ sudo systemctl enable MongoDB
Part Four: Adjusting the Firewall Settings on MongoDB
In some cases, when the firewall is enabled on Ubuntu Server, the access to the MongoDB server may be limited. This setting is ideal and secure if you plan to use the MongoDB server locally with apps operating on the same server.
However, if you intend to connect to the MongoDB database server from the internet, you should enable inbound connections in the Uncomplicated Firewall (UFW). By default, the MongoDB server runs on port 27017, and to permit access to MongoDB via this port; you could run the command sudo ufw allow 27017. However, permitting access to the MongoDB database server via its default port provides unrestricted access to data and the server itself.
For this reason, it’s always wise to allow access only to specific locations. To achieve this, you enable access on the default port but specify the IP address of the other server with explicit rights to connect to the database server. Run the command below:
$ sudo ufw allow from your_other_server_ip/32 to any port 27017
Next, run the command below to check the status of the firewall:
$ sudo ufw allow 27017

$ sudo ufw status
This will give you an output like the one below:

The output clearly shows that port 27017 is allowed anywhere. If you have permitted a specific IP address to access the database server, you should see the allowed IP address listed and not Anywhere in the above output.
Now, even though the default port is open, the database server is currently listening on 127.0.0.1. To permit remote connections, you must include a publicly-routed IP address for your server to Mongo.conf file.
Run the command below to open the Mongo.conf file:
$ sudo nano /etc/mongodb.conf
Locate the bind_ip value and add the desired IP address:
...

logappend=true

bind_ip = 127.0.0.1,your_server_ip

#port = 27017

...
A comma should be placed before adding the IP address you want to allow. Once that is done, Save the changes and exit the editor.
Next, restart MongoDB:
$ sudo systemctl restart mongodb
That’s it! You have successfully modified the firewall settings.
Conclusion
You have successfully installed and configured MongoDB on Ubuntu 22.04. Enjoy the high availability, high performance, and the automatic scaling of MongoDB. Start up MongoDB quickly and enjoy the convenience and fun of creating your applications.


